Today I have some new nail art to show you, and it's super fun to wear! It's almost like a cross between zebra print and fine stripes (sorry about that awful description, lol), and it's named after the culinary confection where hot sugar syrup is spun into small "threads", which is what the pattern resembles. People who are really good at this design (such as Michelle from AllLaqueredUp, her post here: http://www.alllacqueredup.com/2013/07/pinspirationail-spun-sugar-nail-art-revlon-brilliant-strength-nail-enamel.html and Mimi from Makeupwithdrawal, her post here: http://www.makeupwithdrawal.com/2012/05/neon-sugar-spun-manicure.html ) can get the "threads" of polish really thin, but since it's only my first attempt, mine are still pretty thick. Still, for a first try, I'm very excited about the results! Here's how I did it.
First, I painted my nails a base color. In this case, for my thumb, middle, and index finger, I used Rue Beauté in color "031" (a mint-scented bright pastel lime green) and on my pointer finger and pinky, I used Claire's "Hot Stuff" (an eye-searingly hot pink). I used the opposite color on each individual nail as the "spun sugar" color. To make the spun sugar, I put several drops of a single color on a piece of cardboard. I then used a toothpick, and stirred the polish puddle for about 5 minutes, or until the polish thickens enough to still be fluid, but when you pull the toothpick out of the puddle, a string of polish comes up with it. I then pulled those strings, with the toothpick, across my individual nails (one at a time) to create the spun sugar look. I warn you, the finished product DOES have a fair amount of texture, as the thick polish does not dry flat for the most part. Below are pictures of the finished product WITHOUT topcoat and in artificial lighting.

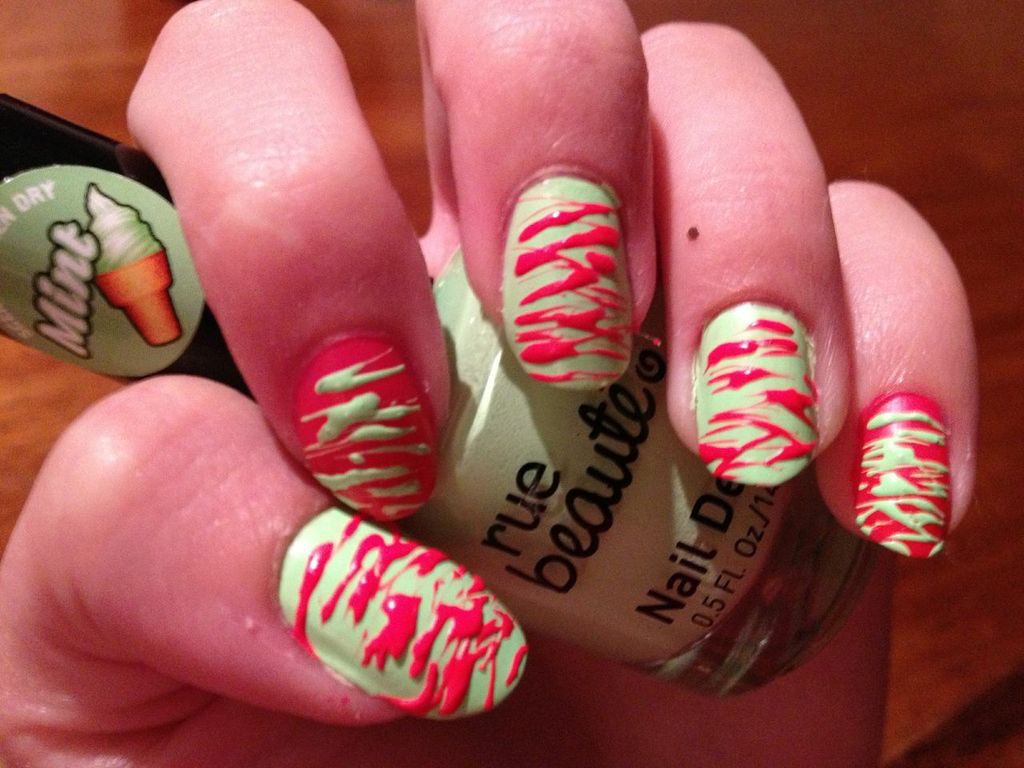

The next photos are with topcoat, which smooths out some of the texture (though not that much) and adds an extra shine to the semi-matte neon colors I used in the design. The topcoat is, as always, Sally Hansen Diamond Strength Nail Color in "Flawless"- one coat on top of the finished and fully dried design.


Sorry for the random speck of glitter on my index finger, that pesky piece wouldn't budge when I tried to remove it!
So what do you think of this innovative new nail art trend? Will you be giving it a try? If you do, leave a comment, and tell me how it works for you! I'll be trying it again in the near future, hopefully with more precise results. Stay tuned!
~Beth~