Tuesday, August 6, 2013

Nail Art- My First Attempt at "Spun Sugar" Nails!

Hi everyone!

Image

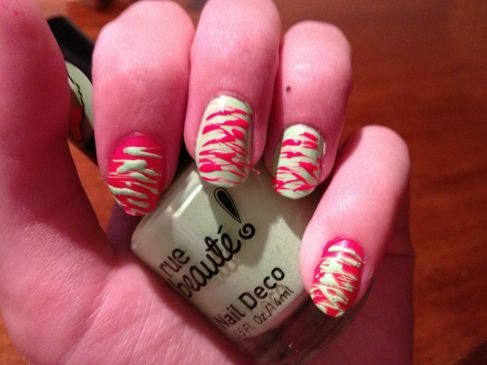
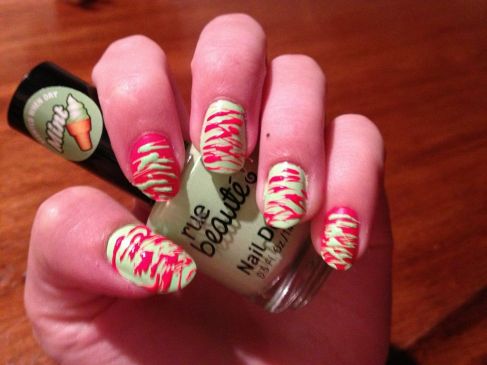
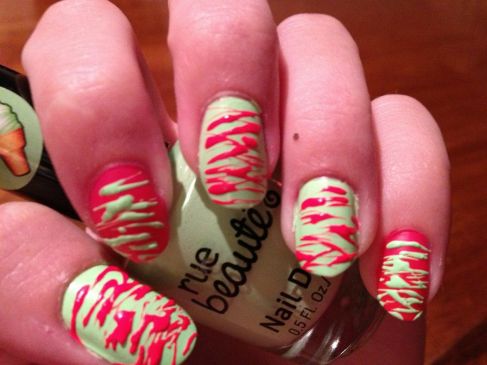
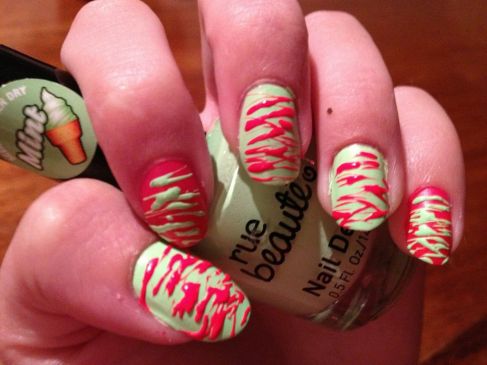
Today I have some new nail art to show you, and it's super fun to wear! It's almost like a cross between zebra print and fine stripes (sorry about that awful description, lol), and it's named after the culinary confection where hot sugar syrup is spun into small "threads", which is what the pattern resembles. People who are really good at this design (such as Michelle from AllLaqueredUp, her post here: http://www.alllacqueredup.com/2013/07/pinspirationail-spun-sugar-nail-art-revlon-brilliant-strength-nail-enamel.html and  Mimi from Makeupwithdrawal, her post here: http://www.makeupwithdrawal.com/2012/05/neon-sugar-spun-manicure.html ) can get the "threads" of polish really thin, but since it's only my first attempt, mine are still pretty thick. Still, for a first try, I'm very excited about the results! Here's how I did it.

First, I painted my nails a base color. In this case, for my thumb, middle, and index finger, I used Rue Beauté in color "031" (a mint-scented bright pastel lime green) and on my pointer finger and pinky, I used Claire's "Hot Stuff" (an eye-searingly hot pink). I used the opposite color on each individual nail as the "spun sugar" color. To make the spun sugar, I put several drops of a single color on a piece of cardboard. I then used a toothpick, and stirred the polish puddle for about 5 minutes, or until the polish thickens enough to still be fluid, but when you pull the toothpick out of the puddle, a string of polish comes up with it. I then pulled those strings, with the toothpick, across my individual nails (one at a time) to create the spun sugar look. I warn you, the finished product DOES have a fair amount of texture, as the thick polish does not dry flat for the most part. Below are pictures of the finished product WITHOUT topcoat and in artificial lighting.
Image

Image

Image

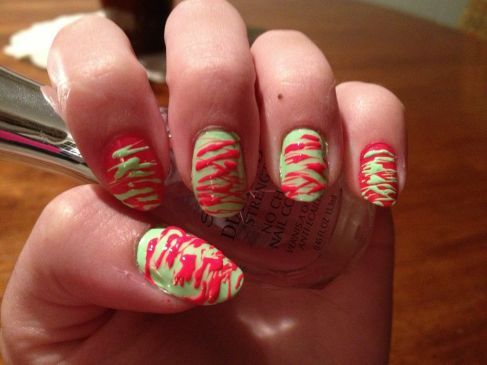
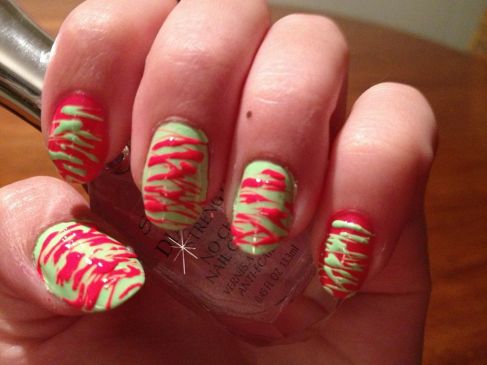
The next photos are with topcoat, which smooths out some of the texture (though not that much) and adds an extra shine to the semi-matte neon colors I used in the design. The topcoat is, as always, Sally Hansen Diamond Strength Nail Color in "Flawless"- one coat on top of the finished and fully dried design.
Image

Image

Sorry for the random speck of glitter on my index finger, that pesky piece wouldn't budge when I tried to remove it!

So what do you think of this innovative new nail art trend? Will you be giving it a try? If you do, leave a comment, and tell me how it works for you! I'll be trying it again in the near future, hopefully with more precise results. Stay tuned!

~Beth~
Monday, August 5, 2013

MOTD- Claire's Nail Polish "Surprise Party"

Hi everyone!

I don't know about where you live, but in Delaware, the weather was fantastic today! I don't think it got above 80 degrees, and there wasn't a cloud in the sky the whole day. I babysat my 3 and 1 year old neighbors, and we just ran around and played outside for hours. I love these kinds of perfect summer days! I wish we had more of them!

Such a beautiful, sunny day called for a beautiful, summery color. And what better polish than a glitter polish to represent the shine of the sun?! I also had a huge purple craving today, so my new Claire's polish seemed to quench all of my polish thirsts!

Image

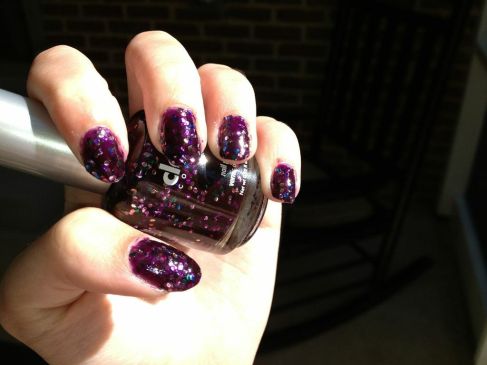
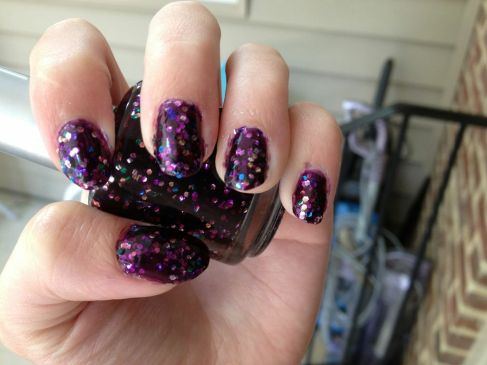
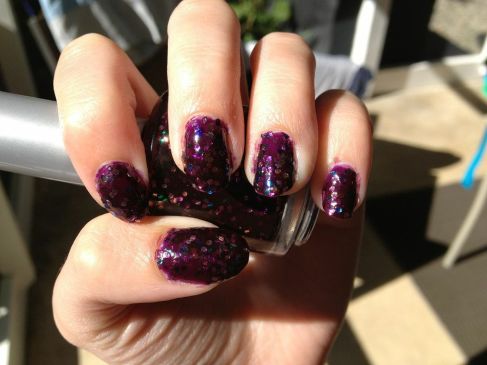
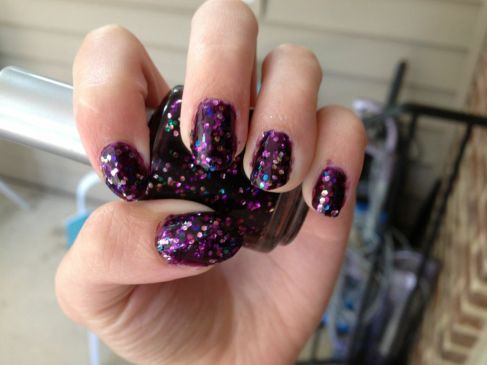
"Surprise Party" is a deep red-purple jelly base (sooo squishy, it'd be great on it's own, too!) with all sorts of colors of moderately sized hex glitters. The glitters sort of rise to the top of the polish on the nail, so with one coat, it looks like the glitter is a separate nail polish on top of the purple. However, after a second coat, the glitter gets more of a "3D" appearance, with some of the glitter being "sandwiched" in the purple jelly. Just a warning to people who hate rough textured nail polish, this will dry somewhat roughly due to the glitter density (and the density/placement of the glitter is pretty spot on with 2-3 coats). To fix this, a few coats of top coat should solve your problem. Two coats of Sally Hansen Diamond Strength Nail Color in "Flawless" did the trick for me!

Overall, I'm a big fan of this polish. I actually got it for free from Claire's as part of a "buy 2 get one free" deal about two weeks ago (and it might still be running at some locations). It's a great, bright, and bold color perfect for the liveliness of summer. Below are pictures of sunlight and indoor lighting with 3 coats of "Surprise Party" and 2 coats of Sally Hansen Diamond Strength Nail Color in "Flawless", no base coat.

Image


Sunlight

Image


Indoor light

Image


Sunlight

Sorry for the messy cuticles, I had a cut on one of them and didn't want to get anywhere near it with acetone! 

So what do you think of this jelly glitter bomb? Will you be wearing a fun, sparkly color to celebrate August and the lazy days of summer? Leave your thoughts in the comments!

~Beth~

Sunday, August 4, 2013

I'm Baaaccckkkk! Vacation MOTD- Love and Beauty "Peacock" and "Pink"

Hi everyone!

I'm back from the cruise! I sailed on the Carnival Pride, and boy, was it wonderful! It was nice to get away for a week and be waited on (and eat everything in sight, lol!). Unfortunately, it rained while I was in the Bahamas (thanks to tropical storm Dorian), but it did little to dampen the fun of the vacation! 

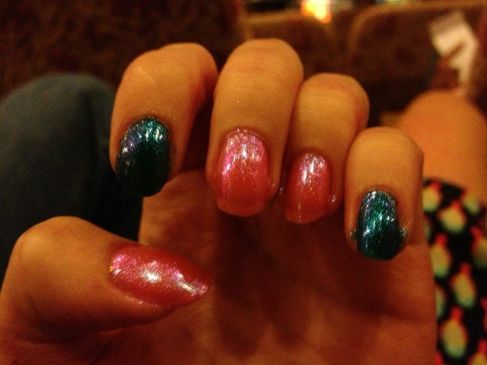
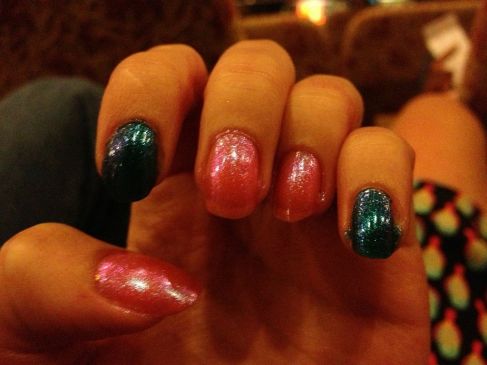
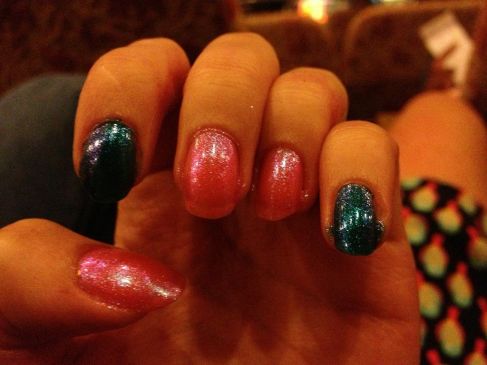
Of course, while I was away, I couldn't neglect my nails! Today I have for you a (very impromptu) MOTD, with the pictures taken in the ship's theater, called the Taj Mahal. Both of the colors I have in the pictures are from Forever 21's line, Love and Beauty, and I bought them both in NYC the week before I left, and gave them a try on the ship!

"Pink" is a a gorgeous, sheer bubblegum/cotton candy pink with a sky blue duochrome shimmer. Don't let the name fool you, it's much more in depth than a standard pink! In the bottle it is a feast for the eyes, it is spectacular! Unfortunately, on the nail, it doesn't translate the same. With 4 coats (seen in the pictures) you can still see visible nail line. I would recommend this color as a layering polish, because it's still so gorgeous!

"Peacock" is a gorgeous dark blue/turquoise shimmer, with a teal and deep purple duochrome running through this. I originally had picked out a different color to buy on my first trip to NYC, but one look at the bottle and I was sold! The color translates extremely well to the nail, and it opaque in 2-3 coats depending on how thick the layers are. I used three in the picture below because while on the ship, I tried to use extra thin coats of polish to help dry it (the ocean humidity can really do a number on wet nails). Pictures below are with no base or top coat (because I forgot to pack mine, oops!)

Image

Image

Image


Again, sorry for the lighting/picture quality of these. It was the best I could do on the ship. But regularly scheduled posts will begin again starting tomorrow, and I've got lots of great polishes to share with you, including one I bought in the Bahamas that changes color in the sun! I'm happy to be back and blogging again, and I hope you'll continue to follow me in my nail polish shenanigans! 

~Beth~

Saturday, July 27, 2013

Hiatus

Hi everyone!

I'm really excited, since I'm leaving on vacation tomorrow! I'm going on a cruise to the Bahamas, and I'm excited to do a little relaxing and sunbathing. Unfortunately, this means I won't have access to a computer for a while, and won't be able to continually update my blog on a daily basis like I usually would. But don't worry! As soon as I return from the trip, a normal posting schedule will resume, and I'll have lots more polishes to share with you! In the meantime, I'd love to hear your feedback. What do you guys like about my blog, and what do you think I could do better? Also, what kinds of posts would you like to see in the future? Thank you for all of your support, and I'll talk to you all when I get back! 

~Beth~

Friday, July 26, 2013

Chinese-Inspired MOTD w/ New Love and Beauty Glitter!

Hi everyone!

Today I have for you another of the polishes that I bought from Forever 21 in NYC. As it happens, I'll be going there again tomorrow with my best friend! We're going to see a show at the Lincoln Center called "Monkey: Journey to the West". It's completely in Mandarin Chinese and features Chinese music and dancing. My Chinese skills are nonexistent, so I hope my friend will help translate for me, lol! Luckily there are English subtitles, so I can still understand what's going on!

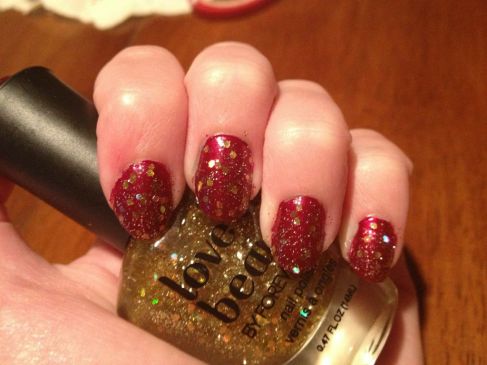
In honor of the show I'm seeing tomorrow, I'm wearing red and gold nail polishes, in honor of the traditional colors of the Chinese flag. The red I chose to use is an Ulta Salon Formula Nail Laquer (in the old, rectangular bottles, as opposed to the new cylindrical ones) in the color "Ruby Slipper". The red is deep, rich, and for a shimmery-frosty color, the brush strokes are extremely manageable. It's almost a one coater for me! To ensure it was perfect, though, I used two coats. 

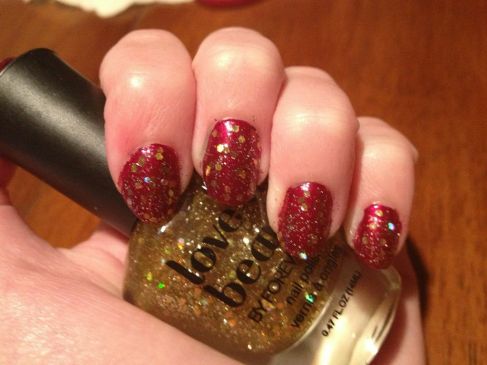
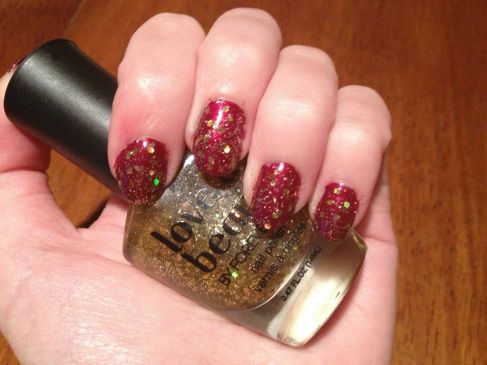
The gold glitter is the Love and Beauty Forever 21 polish I got in NYC, and its name is "Gold". I know, what a creative name for a gold glitter. But while it's got a boring name, it's by no means a boring color! "Gold" has tiny gold glitters mixed in with medium gold and holographic gold hex glitters. The glitter is pretty easy to manage (the formula isn't too thick) and with two coats, the glitter spreads fairly evenly, so you won't have to do too much glitter placement. I love this combo together so much! I think it's perfect for the occasion, and highly sophisticated. Below are pictures in artificial, indoor lighting, with a base coat of Sally Hansen Diamond Strength Nail Color in "Flawless", no topcoat.

Image

Image

Image


What do you think of this glistening combination of colors? Do you like fun, punchy glitters like this one? Let me know!

~Beth~

Thursday, July 25, 2013

MOTD- Love and Beauty "Emerald"

Hi all!

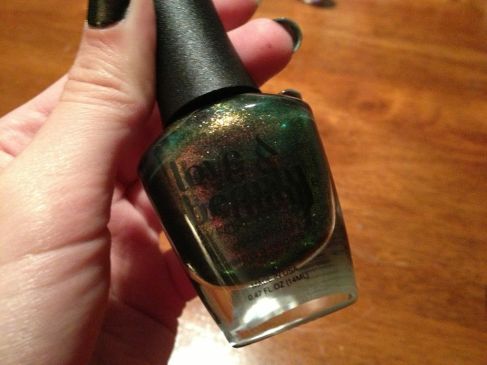
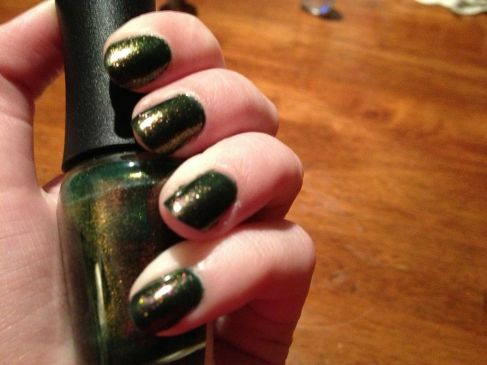
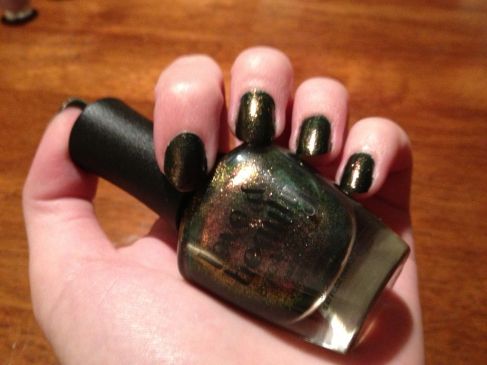
Today I have a really beautiful polish to share with you. It's one of the three Love and Beauty polishes I picked up at the Times Square Forever 21 yesterday. This polish is called "Emerald", and upon first glance, it looks like the person who named it got really confused, lol! In the bottle, it appears to have a very purple, duochrome base, but upon applying it, it definitely has a dark, blue-based emerald base. As you build up the color, though, the emerald gets much darker, and almost appears like a very dark blue-green purple duochrome. No matter what, it's a real gem! Here's a bottle shot below:

Image


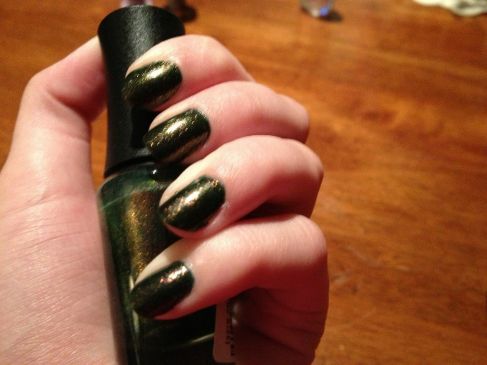
Here you can sort of see the duochrome of the polish, but honestly, pictures do not do this beauty justice. You can hardly see the varying shades of purple shimmer, peach shimmer, gold shimmer, and green in the bottle. It's such a deep, fascinating polish, it just looks different at every single angle. Below are pictures with 4 coats of "Emerald", no topcoat, in indoor, artificial lighting (sorry for the lack of sun pictures today, the weather just wouldn't cooperate)

Image

Image

Image


The formula on this polish was nice, very thin and easy to apply. The only problem was, it was a bit sheer. It took 4 coats to build up so you couldn't see the visible nail line. I wish it were more opaque, because with just 1-2 layers, it's a completely different polish. Deep blue/emerald turquoise with a very purple/red shimmer. Don't get me wrong, the color you see above (which the camera truly didn't capture well enough to do the polish justice) is absolutely phenomenal, but wouldn't it be awesome to get two colors out of one polish?! I'll try it with a white base some time to see how it works.

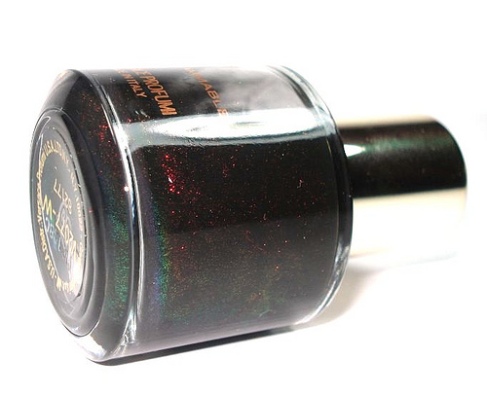
This polish is somewhat similar to another polish I ran across once. While not exact dupes, I think Versace v2077 (picture below) has a very similar look to "Emerald". The bases are slightly different. But considering the hefty pricetag on the Versace, I think "Emerald" is a great, high quality inexpensive choice.

Image

Overall, I think this polish is a must have. Love and Beauty polishes are currently $2.80 at Forever 21 stores, plus tax (unless you're in Delaware, then there's never sales tax! :-D)

What do you think of this unique beauty of a polish? Are you a fan of shimmery duochromes, or is creme your style? Let me know in the comments!

~Beth~

Wednesday, July 24, 2013

Nail Art- New York/Wicked Water Marble

Hi guys!

So today's post is gonna be realllllllyyyyy quick, because I'm dead tired. I just got back from a day trip with my mom; we went to the Big Apple to see Wicked on Broadway! If you haven't been before, I'd highly recommend you do if you have the chance, the show was fantastic! The singing was phenomenal and the sets and costumes and special effects were also amazing. The only flaw? The Gershwin Theater is freezing cold! It was 90 degrees outside and we were all bundled up in our sweaters trying our best to stay warm! Walking out into the stifling heat after the show ended never felt so good!

Image


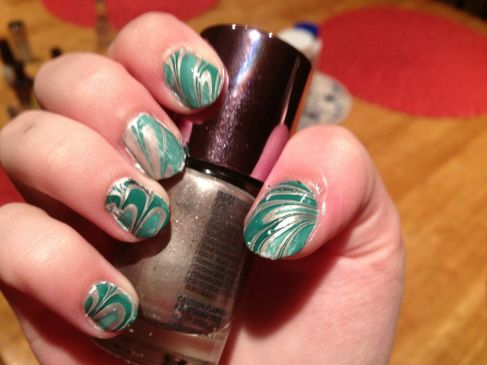
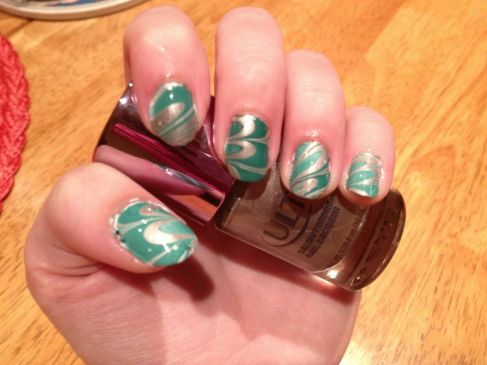
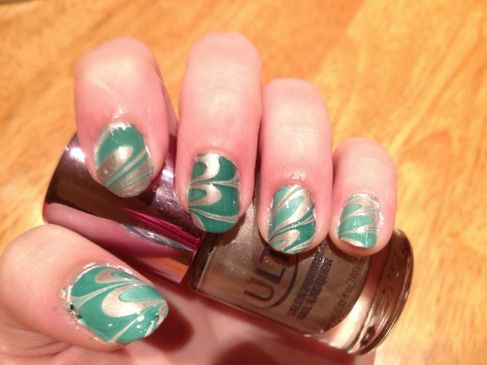
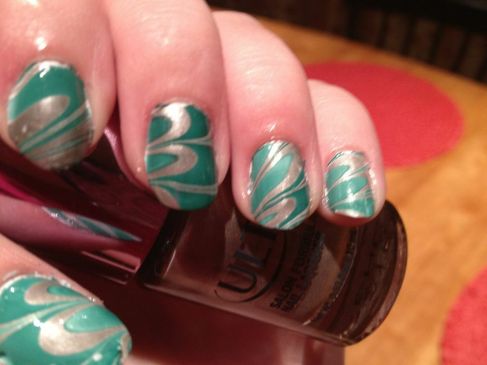
On to the nails. I decided to go with an "Emerald City" themed water marble, in honor of the show I went to see. I used two colors in this water marble (besides my standard Sinful Colors "Snow Me White" for the base):

Green: Rue Beauté Nail Polish in Color 033 (in the bottle it looks like a deep blue/teal color, but in water marbling, it turns out as a rich, blue-based emerald creme)

Silver: Ulta Salon Formula Nail Laquer in "Bare Minimum"

Below are the pictures, with one coat of Sally Hansen Diamond Strength Nail Color in "Flawless" as my top and base coat. Indoor, artificial lighting.

Image

Image

ImageImage


Sorry for how messy the cuticles are, when I took these pictures, I was in a hurry since I was packing my purse for my trip the next day!

I hope you all aren't getting too tired of water marbling. I'll try and post other things in the next coming days. I bought 3 polishes in NYC, and I'm going back Saturday, so I might even get more still! What are your thoughts on this Wicked-inspired manicure? What's your favorite Broadway show?

~Beth~