Tuesday, July 23, 2013

Nail Art- Water Marbling with my Mom!

Hi everyone!

Today I have a special treat for all of you. Over the weekend, I got the opportunity to practice my water marbling technique on some very willing test subjects, er, willing volunteers. :) I did manicures on both my mom and one of my good friends, Tory, but today I'll just be showing you my mom's, and saving Tory's nails for later (solely because I'm too lazy to download those pictures to my computer right now, lol).

Image

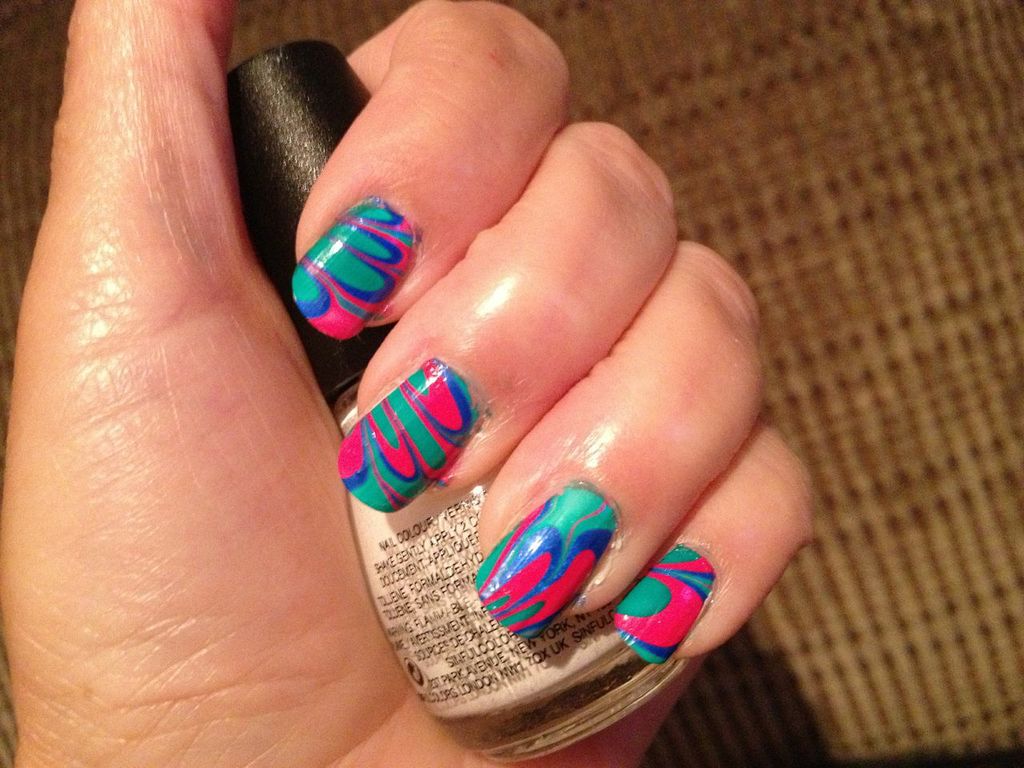
For my mom's nails, I wanted to do something bright and bold, since she loves summer colors. I chose her favorite bright blue, a bold green, and a hot fuschia. The colors I used are as follows:

White (for base): Sinful Colors "Snow Me White"

Blue: Wet N' Wild Fast Dry Nail Color in "Saved by the Blue" (what a great name!)

Green: Rue Beauté in Color 040

Pink: Ulta Salon Formula Nail Laquer in "Fuschiamania"

To do the water marbling itself, I generally use room temperature, or slightly warm, bottled water. I just find that works best for me. I draw the designs using pointed toothpicks, since I am not a fan of using orange sticks, or something like that. I use tape around my cuticles to prevent excess polish from getting on my skin, and remove any mess around my cuticles with warm water in the shower (it peels right off and is less drying than using nail polish remover or acetone, in my opinion). Below are pictures in artificial light, no topcoat, of course, with my beautiful mom modeling for me! She makes a great hand model, no?
Image

Image

Image


I'm extremely proud of how this nail art turned out, I think my water marbling technique is greatly improving! What do you all think? Are you a water marble fan? Are you going to try a bright summer manicure? What nail art designs do you want to see from me in the future?

~Beth~

Monday, July 22, 2013

MOTD- Pink Ice by Rue 21 in Color 031

Hi everyone!

Happy birthday to the new royal baby! I've been more than a little obsessed with following the updates of the royal baby frenzy online recently, so it's cool that it's finally happened!

In other news, today I have for you a fun nail polish I picked up at the mall this weekend. This polish is a sub-brand of the store Rue 21, which is a Forever 21-esque store that sells clothing, jewelry, shoes, accessories, make up, nail polish, all sorts of great things! The brand is called Pink Ice (not to be confused with Pure Ice, the Walmart nail polish brand), and has pretty awesome glitter and creme polishes. At my Rue 21 location, they just expanded the line, and this color I'm showing you today is part of it. I also have another amazing glitter mix from them that I'll share at another time.

Color 031 (this brand doesn't have names, unfortunately) is a minty green pastel base, with tiny black hex glitters in it. I think this is very reminiscent of mint chocolate chip ice cream, or a pastel kiwi fruit! I'm absolutely in love. The formula of this polish was on the thick side, but not unworkable, and the glitter was evenly distributed throughout the bottle. It took about 2-3 coats, depending on how thickly you paint them on, to become opaque. Without topcoat, the polish is a bit rough to the touch when dry because of the density of glitter, but 1-2 layers of a good topcoat smoothes it right out. 1 coat of Sally Hansen Diamond Strength Nail Color in "Flawless" did the trick for me! Below are pictures in indoor, artificial lighting, on my right hand (which may explain the awkward angles in some of the pictures, because I'm right handed and had to take pictures with my left!). 3 coats of 031.

Image

Image

Image

Packaging-wise, this polish is a total win. The bottle is uniquely square shaped, somewhat similar to old Rimmel packaging (I think I got that brand right...). My only gripe about this polish is that the brush on this particular bottle is terrible. It's bristles are hard to control and just poorly shaped. I didn't have that issue on the other Pink Ice polish I have, so maybe it's an oddity.

I also saw a striking similarity in this polish to Deborah Lippman's "Rockin' Robin" (picture below). While I don't own Rockin' Robin to compare the two, they look fairly similar just in the bottles, with Rockin' Robin potentially being slightly lighter in color than 031. If you're looking for a cheaper dupe of Deborah Lippman, this would probably be the way to go!

Image Rockin' Robin

So what do you think of this minty fun polish? Are you a fan of black glitter? Will this be getting added to your nail polish stash in the near future?

~Beth~

Sunday, July 21, 2013

Sunday Funday Nail Art! - "Nautical" Stripes

Hi everyone!

Image

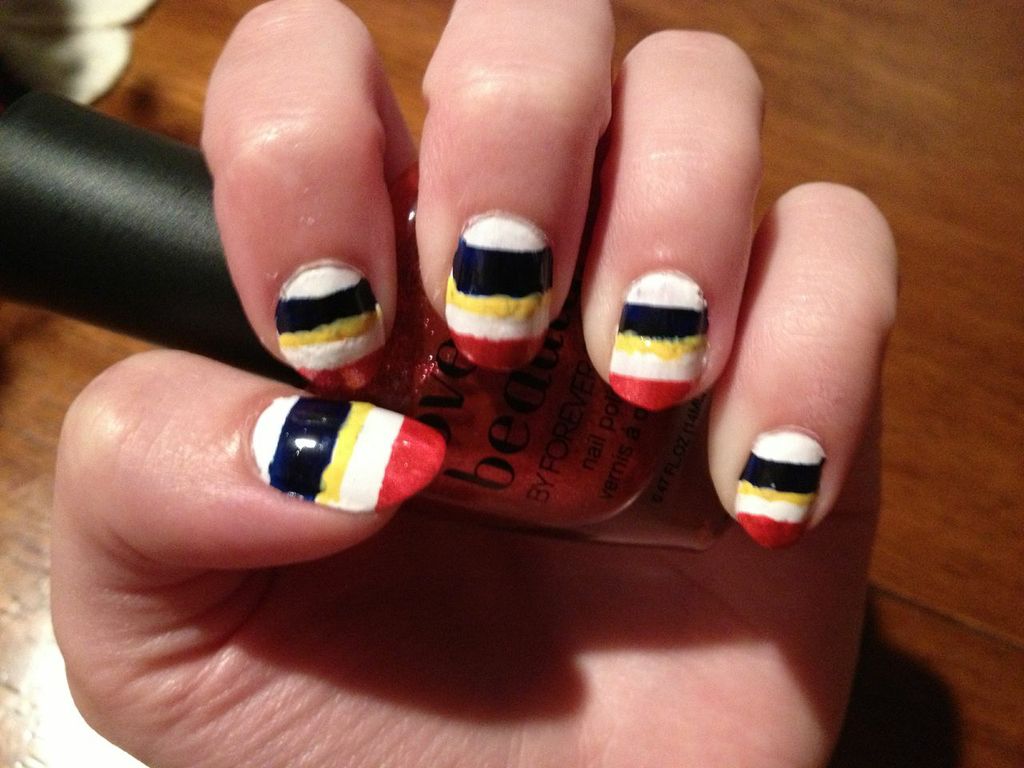
Today I have for you a fun, bold nail art design that's easy to create and is sure to garner you a ton of compliments! I wore it out to the mall today, and every cashier I talked to said that they loved it, it felt great! 

To create this look, I started with a base coat of Sally Hansen Diamond Strength Nail Color in "Flawless", and then painted on one coat of Sinful Colors "Snow Me White" (reviewed yesterday). I let the white dry COMPLETELY (about 15 minutes) before moving on. I took regular scotch tape pieces long enough to stretch horizontally across my nail, and pressed them into my skin and peeled them off a few times to reduce the stickiness, so that they wouldn't pull up nail polish. I then used different patterns of the tape to create different sized stripes for each color. The tape ensures that the lines are nice and crisp. As soon as you paint on the next layer of color, peel off the tape. If you let the polish dry first, you won't get as sharp of a line. If you have little mistakes in the line, just go over it later in the color you want it to be. Repeat until the design matches mine, or until you like it. Feel free to swap out colors! I didn't have a camera available to me while I was doing the design, so I don't have pictures of me creating it. However, I highly doubt this will be my last "tape" manicure, so I'll be sure to show pictures next time!

The colors I used in this design are as follows:

Pink: Love and Beauty in "Red" (what an awful name for a pink, right? But it's a great polish anyways, thin and easy to apply, and so shiny!)

White: Sinful Colors "Snow Me White" 

Yellow: Sally Hansen Xtreme Wear Nail Color in "Mellow Yellow"

Navy: Rue Beauté Nail Color in color 043

Below are pictures indoors, artificial lighting, with one topcoat of Sally Hansen Diamond Strength Nail Color in "Flawless" as a top coat. 


Image

Image

Image


So what do you think of this fun, wearable nail art? Simple enough for you, or too loud and crazy? What's your favorite summer nail look? Keep checking my blog this week, I have lots more nail art and water marble looks to show you, including guest hand models including one of my best friends, Tory, and my Mom!

~Beth~

Saturday, July 20, 2013

My Favorite (Inexpensive) White Polish

Hi all!

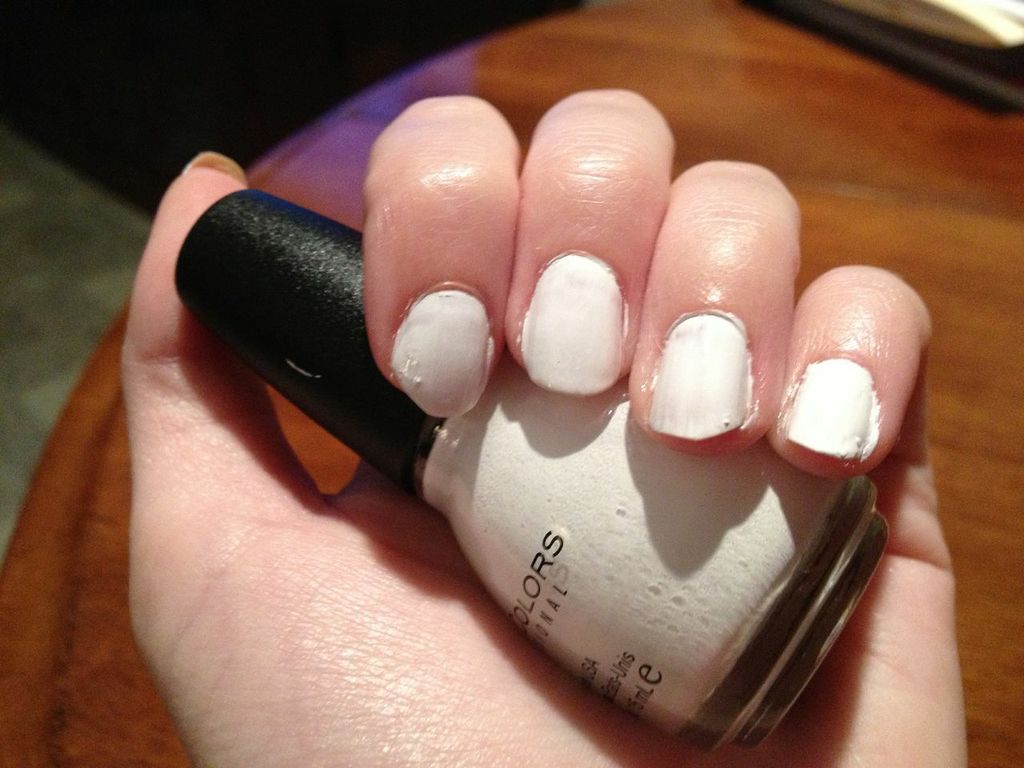
Today I have a bit of a "filler" post for you, because I have an awesome nail art design to show you tomorrow! (it's not quite finished yet though, I just got too tired to keep going, lol). Today I have for you Sinful Colors "Snow Me White", my favorite white polish of the moment! I like how it gives excellent coverage in just one coat (!!!) and isn't as streaky as some of the others I have tried. It's still on the thick side, but it's not unmanageable. I realize brands like OPI or China Glaze or Zoya might have better formulas than the $1.99 Sinful Colors, but at a price under $2, I'm willing to deal with slight imperfections. These pictures below are indoors, and are just one coat, no top coat, with Sally Hansen Diamond Strength Nail Color in "Flawless" as a base.

Image


Image


Sorry for the messy cuticles, I was in a bit of a rush.

What do you think of "Snow me White"? What's your favorite white polish?

~Beth~

Thursday, July 18, 2013

Nail Art- Summer Neon Water Marble

Hi everyone!

So yesterday's "flashback" post inspired me to try some water marble nail art again. I hadn't done it in about a year (school has been crazy with AP's and extracurriculars!) so I had to get the hang of it again. And let me tell you, I made a hugeee mess in the process! To add to the length of time it took to (finally!!!) get it right, I completely botched the white nail polish (that I use as a base for the design) on my entire left hand and had to stop, remove it, and start over again. I'm really such a klutz sometimes! In the end though, I'm satisfied with the results.

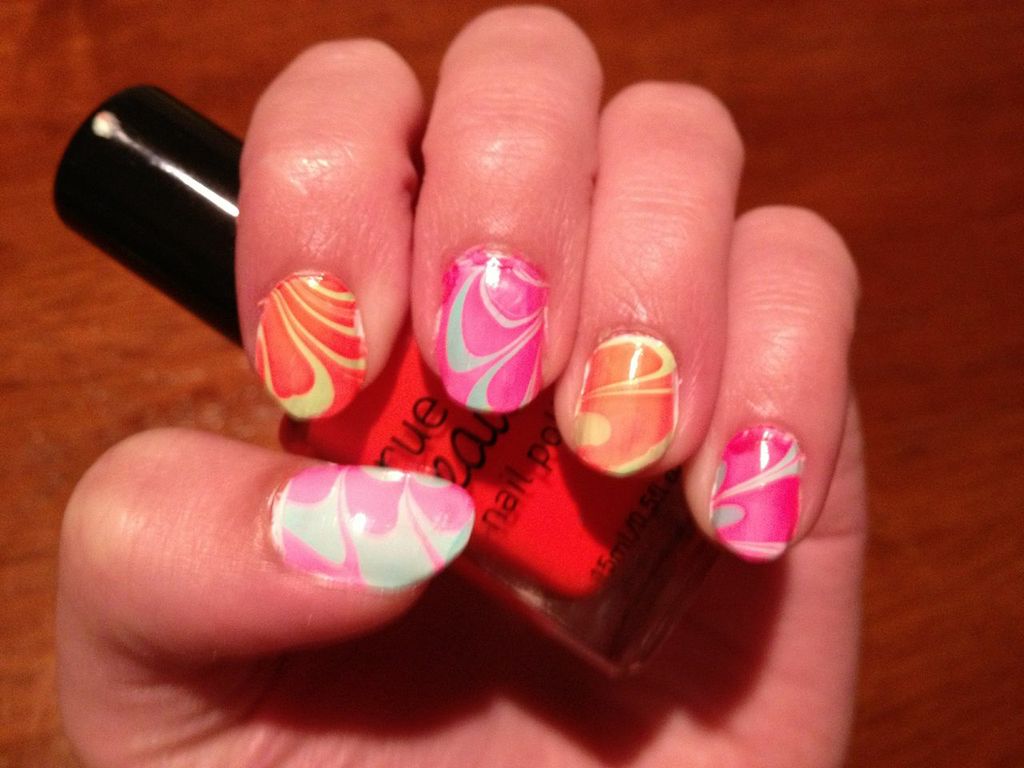
My original plan for this design was to mix all four colors (orange, green, blue, and pink) together in one design, but when i started making the bullseye, I found out the four of them together didn't play nice. Instead, I flip-flopped between green and orange on one nail and pink and blue on another, because those two combinations worked in the water (I used room temperature bottled water). The colors I used for this design are as follows:

Rue Beauté orange polish in color 145

Rue Beauté scented green polish (smells like mint!) in color 031

dELIA's blue polish in "Blue-Mint"

Claire's hot pink polish in "Hot Stuff"

Below are pictures of the final result. The white polish I used as a base was Ulta Salon Formula Nail Laquer in "Snow White", and the base and top coat are, as always, Sally Hansen Diamond Strength nail polish in "Flawless".

ImageRight Hand

ImageRight Hand

ImageLeft Hand

ImageLeft Hand

I apologize for the pictures for this one, it was picking up the orange all kinds of wrong. In these pictures, it looks like an orange-y red or a dark peach, when in reality it's a real in-your-face neon orange. All these colors are much more eye-searing in person.

So what do you think of my latest water-marble creation? Are you a fan of summer neons?

~Beth~


Wednesday, July 17, 2013

Throwback Thursday- Black and White Water Marble Nails

Hi everyone!

Today I have an old picture to share with you, since I didn't get a chance to swatch any new polish shades today. Last year, I had a small obsession with water marbling nail art. I was fascinated with it after watching youtubers (like ilovemylongnails and simplelittlepleasues, to name a few) do it so flawlessly. After mastering the technique (the water temperature is soooo important, it really needs to be very room temperature), I did all sorts of color combinations. This simple black and white one might be my favorite of them all. I always start with a base coat of white, to enhance the color, then used unknown black and white polishes to make the water marble "bullseye", and draw the design with toothpicks. I taped my cuticles around the nail to prevent making a giant mess (though isn't making a mess always inevitable?) and dipped away! Here's a (low quality) picture of the result.

Image

I'm super thrilled with how this old nail art turned out. Maybe I'll do some more in the near future with some of the fun new colors I've acquired as of late. What color combos would you all like to see? Have any of you tried water marbling?

~Beth~

Tuesday, July 16, 2013

MOTD- Sally Hansen Xtreme Wear "Mellow Yellow" With Claire's Precious Metals Glitter!

Hi everyone!

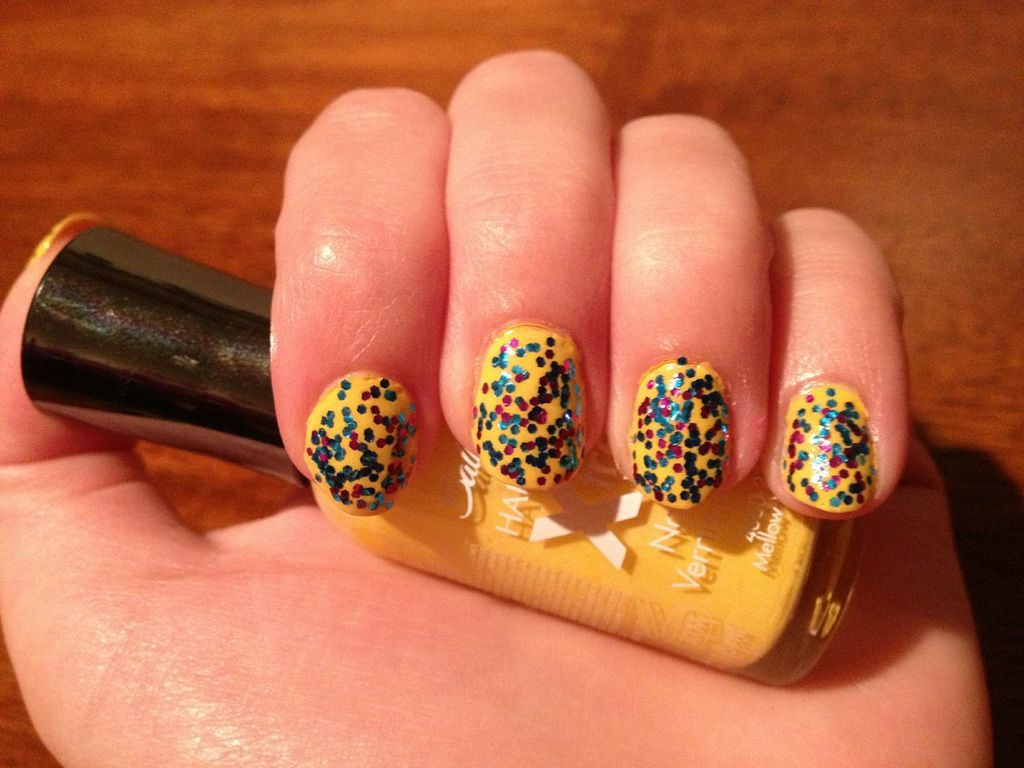
Today I have for you a quick MOTD, featuring one of the new "Precious Metals" glitter topcoats from Claire's. Unfortunately, none of these polishes have names, so we'll just call this one "blue/pink", since those are the colors of the glitters in it!

First, I'll discuss the Sally Hansen Xtreme Wear "Mellow Yellow". While I love this almost "cheesy" yellow polish's color, it's not too fun to apply. I found the formula to be somewhat thick, and while it was fairly self-leveling, I still found there to be bald spots, even after 3 coats (and I gave up at three coats because I was too impatient!) It took FOREVER to dry as well. However, it's still a decent yellow, so the color alone is what saves it for me.

The Claire's glitter, on the other hand, was a real winner for me. It didn't require any "positioning" of the glitter, and was to my liking in two thin coats. It also was SUPER fast drying so I hardly had to wait between layers! I think it looks great over the yellow, the three primary colors work well together. It's almost a comic book effect, in my opinion. Below are pictures in indoor lighting, with 3 coats of "Mellow Yellow", two coats of the glitter, and Sally Hansen Diamond Strength polish in "Flawless" for the base and topcoat.

Image

Image

Image


What do you think? Are you bold enough to try yellow polish? Are you as in love with glitter as I am? 

In other, much sadder news, a fellow member of the online beauty community has passed away today. Talia Castellano, age 13, died from her cancer today. Even though cancer took her life in the end, she still won her battle. She inspired so many others, like myself, to "just keep swimming", no matter how hard things get. And due to her undying commitment to her cause, she's helped raise awareness to several charities to help bring light to the horrific disease that is childhood cancer. May she rest in peace knowing that she's touched the world in a beautiful way, and her bright, amazing spirit will never be gone. 

~Beth~